Open an Xbox One Controller
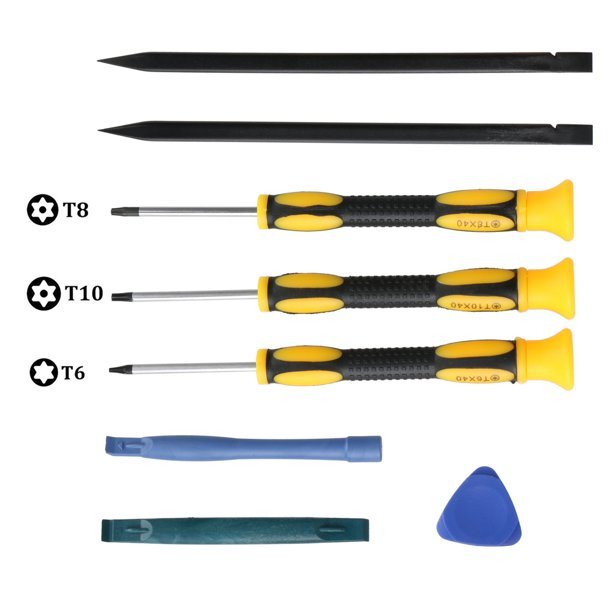
Looking for a tutorial to open an Xbox One controller? You’ve come to the right place! Dissembling an Xbox One controller isn’t a cakewalk but if you’re careful enough and have the right toolset, you can get through this with no trouble. I once tried to disassemble my only Xbox One controller but after I got into the 2nd step mentioned below, I didn’t have the right screwdrivers to go further. Later that week, I received a package from Amazon, because I had ordered a toolset with all those weird screwdrivers and could proceed further.
Steps for Opening an Xbox One Controller
Here are the steps for disassembling your Xbox One controller.

- The first step would be to get the battery cover off. That’s what you do when you change the AAA batteries on your controller.
- Get the batteries off and you will see a warranty sticker. Right in the center of this warranty sticker will be the first T8 screw.

Step 3
Get rid of the side panels using a spudger. You will have to wedge the spudger along the line where the side plates are attaching to the backplate. And don’t use your nails for getting this done because it’s going to hurt.
Step 4
After removing the side panels, 4 more T8 screws can be seen. You will need to unscrew a total of 5 T8s in the back of your controller.
Step 5
After you have loosened all the T8s, it’s time to get the front faceplate off.
Step 6
Get the T6 screws off then proceed to remove the Printed Circuit Board.
Step 7
Gently pull for separating the connectors.
Step 8
While removing the circuit board, be very careful with the wires. The board won’t come off without disconnecting these wires and in order to reconnect them, soldering is required.
Step 9
Fold over the top cover and there will be 5 T6s and an allen for you to remove.
Step 10
Remove this circuit board and you will see ABYX buttons under the rubber paddings. There you have it! A fully disassembled Xbox One controller!
Reassembling and Warranty Issues
Want to get your controller back together? Follow exactly these steps in reverse but make sure that you will need a soldering machine to get those wires (which you disconnected in step 8) back in place.
Want to play Xbox One games with a keyboard and mouse on your PC? Microsoft will ban you if they figure out that you are playing with keyboard and mouse against controller players. Let’s just ignore that for a moment and check out these Xbox One Emulators for PC that actually work!
It’s highly recommended that you don’t disassemble an Xbox One controller on your own because it’s very fragile. Your warranty is void after exposing the T8 screw behind the warranty cover. If your triggers are making some sort of crashing noise, you can watch this video on YouTube and check out the comment section for the solution.
https://www.youtube.com/watch?v=F51Ab_7Hpjg
Let us know in the comments below if you are unable to disassemble your Xbox One controller.


